Building My Home Garden: A Year in the Making
If you've been wondering why my community garden plot looked a bit neglected this year, I have a good excuse: I was busy building a garden at home! What started as a winter planning project turned into a full-season construction endeavor, and I'm excited to share the journey with you.

Finding the Right Spot
The first challenge was figuring out where to put a garden on our property. We live in a wooded area, so sun is at a premium. After some careful observation during the fall and winter, I identified the best spot: right by the street in my front yard, between us and our neighbors. Yes, the front yard! There's no rule that says a veggie garden has to be hidden in the backyard. If your front yard gets better sun, put your garden there. (Thankfully I don't live in an HOA, so no one can tell me otherwise!) The catch? Several trees needed to come down to let the sun in, and a good portion of them were on the neighbors' property. To my surprise, they agreed to let me remove them!
Tree Removal and Stump Grinding
After cutting down the trees, I hired someone to grind most of the stumps. However, I purposely saved two of them. Using a router, I leveled the tops of these stumps to create perfect bases for my blue GreenStalk planters. They worked out great this year and anchor the corners of the garden really well.
The Fence: An Exercise in Patience
I knew from my community garden days that a good fence is essential to keep out critters. But I seriously underestimated how long this would take. To keep burrowing animals from digging under the fence, I decided to bury part of it underground. I rented a trencher from Home Depot to dig the trench for the buried portion of the fence, as well as for the irrigation line and electrical cable running to the house.
Here's where things got challenging. This is New England, after all, where we grow more rocks than veggies! I hit a LOT of tree roots and rocks with that trencher - some rocks bigger than a basketball. For the fence post holes, I used a big iron rod (with a chisel end) and a post hole digger. About half of the holes gave me problems. I went through many reciprocating saw blades cutting through roots, and manually "jack hammered" some rocks to pieces using the chisel end of the iron rod.
Several fence post holes were simply too rocky to dig to a proper depth. I was aiming for 30" of fence post buried underground, but some I had to settle for 20". One was only 8" deep due to a large boulder that I could not break or move. For these shallower holes, as well as the corners and gates, I cemented in the fence posts to keep them sturdy for years to come.
The fence posts alternate between 8ft and 10ft tall. For the fencing material, I used 2"x4" welded wire, then added 1/2" hardware cloth to the bottom portion to keep out smaller critters like rabbits. On top, I ran some patio lights which serve double duty: they provide nice ambient lighting in the evening and help deter deer from attempting to jump over the roughly 5.5-foot-tall fence.
The fence has two gates. The main gate is a double-door gate positioned at a diagonal, just a short walk from the front door. The second gate is a single door down the hill, aligned with a walkway between two raised beds. I used special metal gate brackets to ensure both gates stay square and don't sag over time.
One thing you might notice throughout the garden is how many things are 3D printed. From the caps on top of each fence post to the handles on the garden gates, my 3D printer has been working overtime for this project. It's a great way to get custom parts that fit exactly right without breaking the bank.
Building the Raised Beds
I've written before about how to build a raised garden bed, and the principles are the same here - just at a larger scale. For the raised beds, I sourced 2" thick pine boards (2x10") from a local sawmill. It was actually cheaper than getting lumber from Home Depot, plus the boards are thicker and look better. My previous raised beds made from standard lumber have lasted over 5 years, so I'm hoping these thicker boards will last even longer.
At the bottom of each raised bed, I stapled hardware cloth to keep voles and other critters from digging up through the beds. After dealing with voles in the past, I wasn't taking any chances!
The beds are arranged in a 2x5 pattern - that's 10 raised beds total, each measuring 4'x8' with 4-foot walkways between them. Between each pair of beds, I'm installing arch trellises for growing vining produce like beans, peas, and squash. Since I was still building the garden well into the season, I didn't get these planted in time. The two arch trellises I did install were underutilized this year, but I'm really looking forward to seeing them covered in vines in 2026!
Drip Irrigation: Set It and (Mostly) Forget It
While I had the trencher, I dug a trench to the house and ran 3/4" irrigation pipe and ground-rated electrical Romex cable to the garden. The irrigation system has three timer zones: one for the raised beds, one for the GreenStalks, and a third currently unused zone for the perimeter where I plan to add hanging flower baskets.
Having drip irrigation is a game-changer, especially compared to hauling jugs of water to the community garden in spring, before they turned on the well pump. Stay tuned - I'm planning a separate post on how to set up a drip irrigation system.
Filling the Beds
I filled the raised beds with a "garden soil" mixture from my local soil supplier - a blend of top soil, compost, and manure. I was able to use my new landscape trailer to haul the soil and save on delivery fees, though it did require one trip per raised bed. For the first 5 beds, I drove my minivan with the trailer through the trees (it barely fit!) and parked right next to each bed to be filled. Made unloading a breeze. As of now, I've only filled 6 of the 10 beds. The fence took way longer than expected (seriously, the rocks!), so I ran out of time and energy before I could complete everything. I'll be filling the remaining 4 beds in the spring.
Saying Goodbye to the Community Garden
Overall, I'm very happy with how the garden has turned out! So much so that I've decided not to renew my community garden plot for 2026. I've now got plenty of growing space with a convenient location right outside my door and an automated drip irrigation system.
I did stop by the community garden plot this fall to trim some weeds and lay down cardboard. Hopefully that will give the next gardener a head start against the weeds next spring. I left the perennials - some strawberries, a whole patch of raspberries, and rhubarb. Hopefully my legacy garden neighbor handles the weeds better than I did this past summer!
What's Next
For 2026, my goals are to:
- Fill the remaining 4 raised beds with soil
- Build a potting bench!
- Get the arch trellises fully planted with climbing vegetables
- Add hanging flower baskets around the perimeter
- Fine-tune the irrigation system
- Grow a wildflower meadow on the hill next to the garden - my honeybees (also started in 2025!) will love those flowers, along with everything blooming in the garden
It's been a lot of work, but having a garden right at home makes it all worth it. No more driving to the community garden, no more forgetting to water on hot days, and plenty of room to grow. I can't wait to see what next season brings!
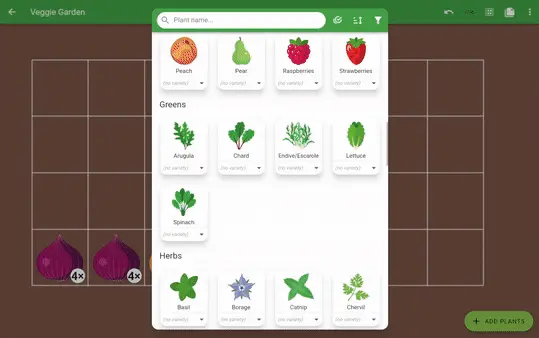
Put away the pen and paper
Plan your veggie garden in minutes with Planter's easy drag and drop planner.
Try Planter for Free